
Required components
Before configuring, make sure that the following components are present and available:
|
Component |
Required Specification |
|
Gaumard-System |
Windows 11 Pro computer with Gaumard Software (UNI) version 3.18.3.0 or later |
|
Gaumard-Code |
Activation code for the simulator's virtual vital signs monitor, available from your Gaumard distributor. |
|
SKILLQUBE-System |
qubeMONITOR |
|
SKILLQUBE License |
License key for the desired software interface (e.g. qubeC3, qubeX, qube15 etc.) |
|
Network |
Both systems (Windows computer with Gaumard software and qubeMONITOR) must be on the same Wi-Fi |
Scope of performance of the qubeCONNECT interface with Gaumard simulators and UNI3
|
SIMULATION |
DESCRIPTION |
RECOMMENDATION / NOTES |
|
ECG Rhythms |
The ECG rhythms from the UNI software are not mirrored 1:1. Instead, the qubeMONITOR synchronizes the rhythm type and selects the corresponding waveform from its own high-fidelity waveform library. Rhythms that are not available on the qubeMONITOR are automatically hidden in UNI once the systems are connected. Important: 12-lead ECGs set in UNI (including axis deviations) are not synchronized or displayed on the qubeMONITOR. |
Once connected, only the rhythms available on the qubeMONITOR can be used. This ensures consistent and realistic waveform output. Agonal Acute posterior MI Old inferior posterior MI Asystole AV block 1st degree AV block 2nd degree (Type I) AV block 2nd degree (Type II) AV block 3rd degree Idioventricular Inferior ischemia Junctional Ventricular flutter Ventricular fibrillation Ventricular fibrillation – Fine Ventricular fibrillation – Coarse Ventricular fibrillation – Very fine Ventricular fibrillation – Very coarse Left bundle branch block Right bundle branch block Sinus Supraventricular tachycardia Torsades de pointes Ventricular tachycardia – Multifocal Ventricular tachycardia – Unifocal Ventricular pacemaker Atrial pacemaker Atrial flutter Atrial fibrillation Wolff-Parkinson-White |
|
Scenarios |
Existing scenarios that use ECG rhythms not supported by the qubeMONITOR cannot be executed when systems are connected. UNI will display an error (“Clinical State cannot be executed”). |
Replace the unsupported ECG rhythm in the UNI scenario with one of the supported rhythms listed above to ensure smooth execution. |
|
Pulse- Synchronization |
There is a limited synchronization between the palpable pulses of the simulator and the ECG displayed on the qubeMONITOR. |
This is purely an informational note to help you design scenarios appropriately. |
|
Pacing |
If the pacing takeover prompt in UNI (after exceeding the threshold) is not confirmed immediately, a display delay may occur (UNI shows sinus rhythm while the qubeMONITOR already shows pacing). |
In UNI, go to Options → “Auto Response Pacing” and set it to Auto. Additionally, adjust the mA value individually for optimal synchronization. |
Gaumard API – Configuration and Connection
1. Settings in Gaumard Software (UNI)
Perform the following steps in the Gaumard UNI software to enable and configure the API:
- Start the UNI software and select the appropriate simulator.
- Click the “gear icon” (⚙), select “Options”, and select “Add Ons”.
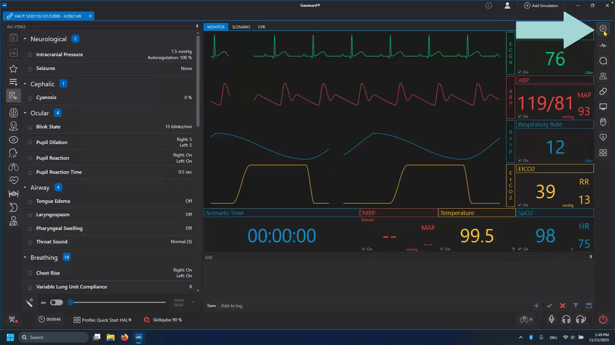
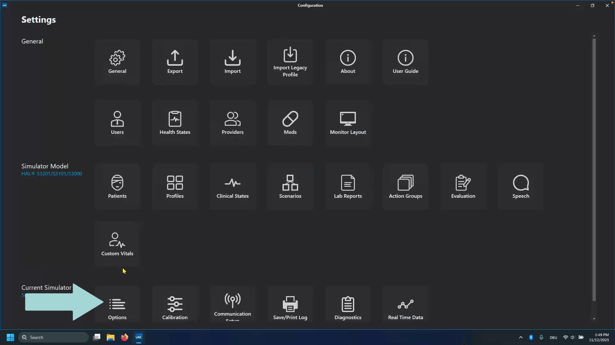
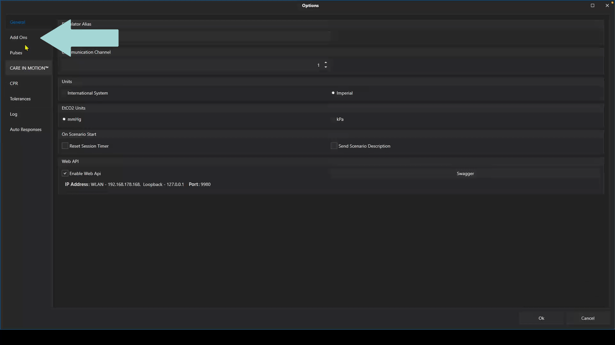
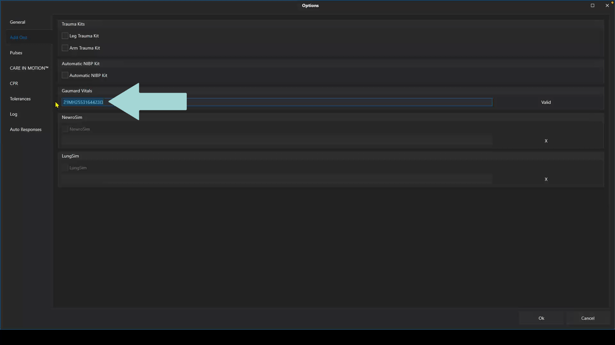
- Enter the activation code you received in the "Gaumard Vital Signs" field and press “OK”.
- Click the “gear icon” again, select “Options”, and then "General”.
- Check the box next to "Enable Web API" and press “OK”.
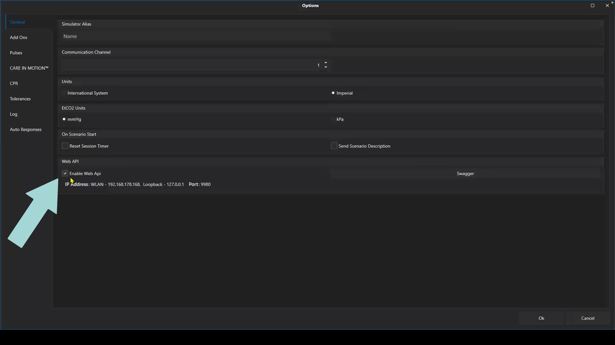
- Restart the Gaumard software for the changes to take effect.
- After restarting, navigate to “Gear icon”, “Options”, “General” again. The IP-address of the computer is now displayed under the "Enable Web API" option.
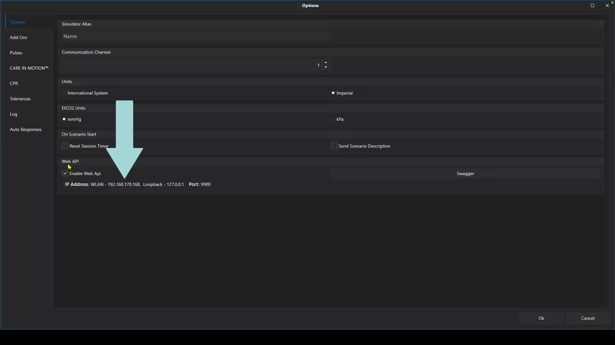
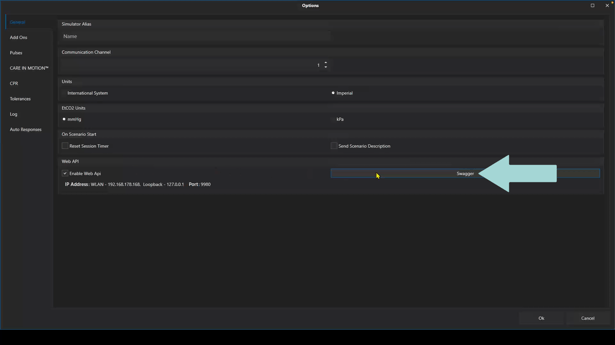
- Click on "Swagger". The web browser will open and display the "UNI API".
- The web browser will open and display the "UNI API".
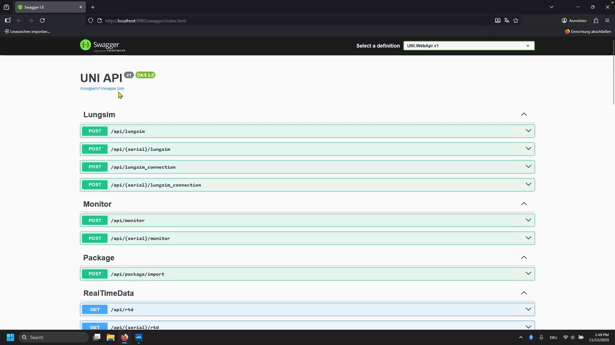
- Close the web browser again.
2. Settings on the qubeMONITOR
Configure the desired app on the iPAD as follows to establish the connection:
- Launch the licensed SKILLQUBE software (e.g. qubeC3T) on the iPad.
- On the iPad, swipe from the left edge to the center to open the menu.
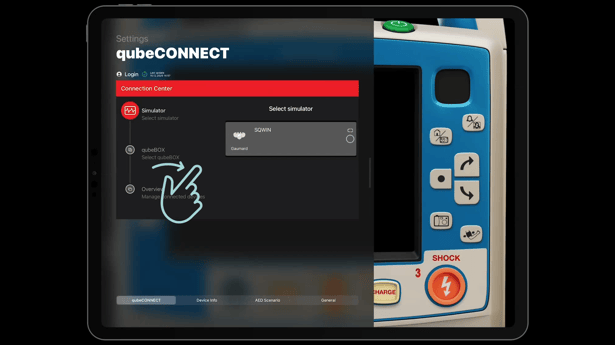
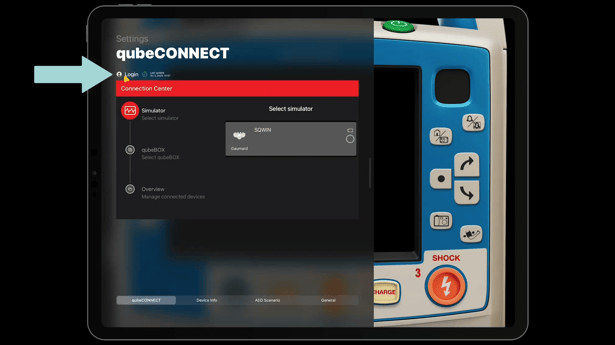
- Perform the login and activate an existing software license, the app will then automatically synchronize with the qubeCLOUD.
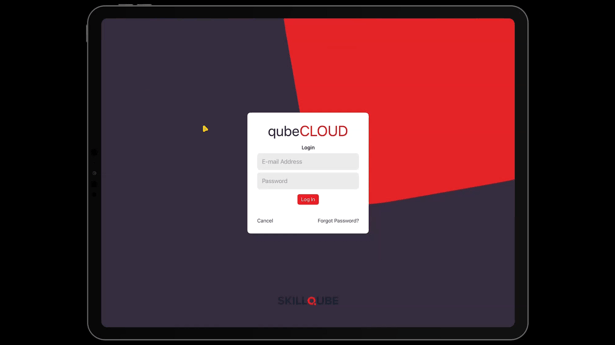
- Select and activate your license key (e.g. qubeXA - Gaumard API)
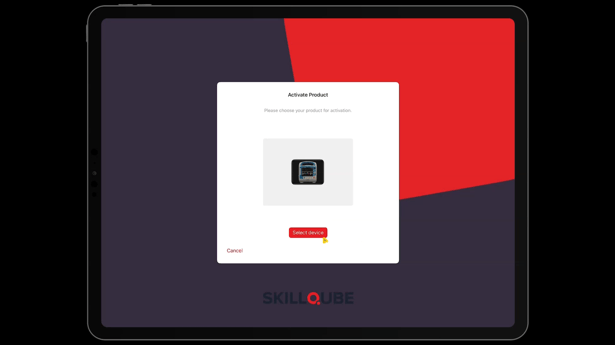
- The simulator will now appear in the app's Connection Center.
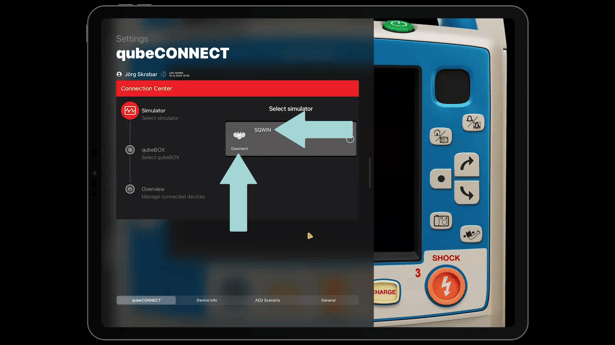
- Connect to the displayed simulator.
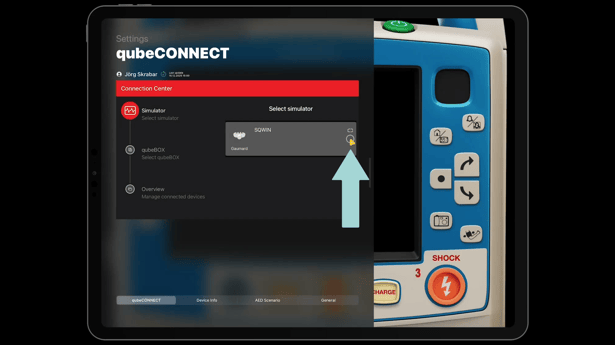
- In the Connection Center, switch to qubeBOX and click the Connect button.
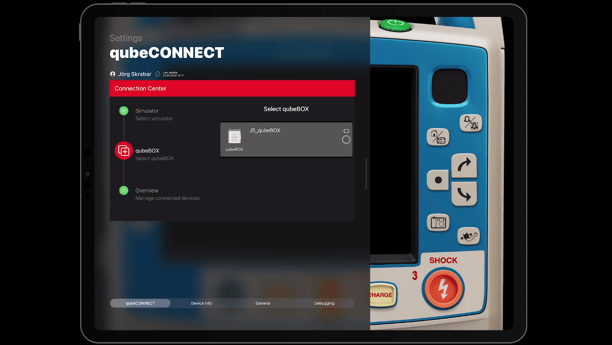
- Close the menu again and start the Monitor.
- Connection confirmation
After a successful connection, a pop-up window will appear in the Gaumard software confirming the connection of the monitor. In addition, the Skillqube icon appears in the UNI taskbar with the current battery charge of the qubeMONITOR in percentage.
The systems are now connected to each other and ready for operation.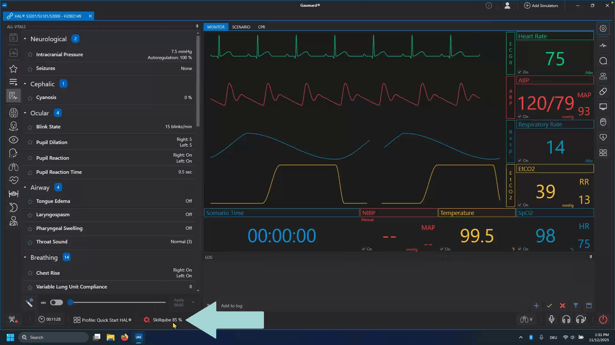
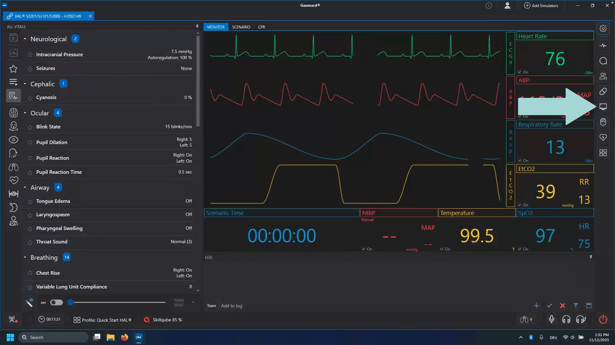
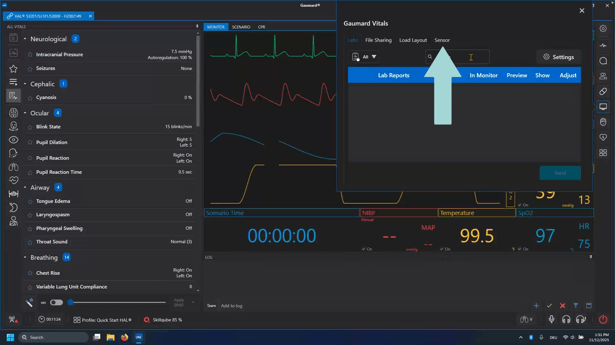
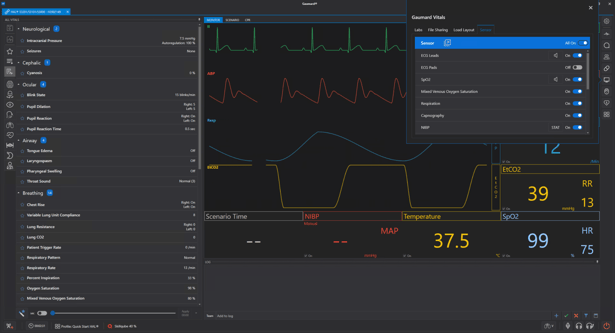
- Click on the „Screen icon“ and then on „Sensor“ to activate or deactivate the curves.
For a better illustration, please find below a video that explains the entire process step by step.
Video coming soon