App Settings
Monitor-specific app settings are accessed via the qubeCLOUD This needs to be configured. Your organization's administrator or device manager must configure the appropriate settings. Refer to the instructions for more information qubeCLOUD and the qubeCONTROL.
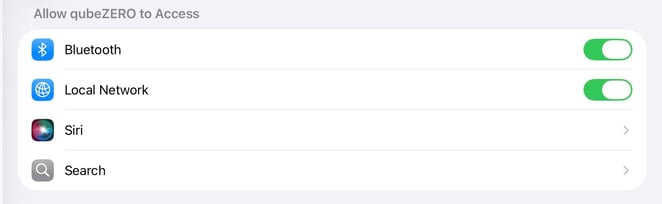
Only the app language selection is configured in the local settings. Furthermore, you can grant permission here for the app to connect to the local network and use Bluetooth to work with compatible CPR feedback devices. This function must always be enabled for the qubeSERIES apps to communicate with each other!
On/Off and Views
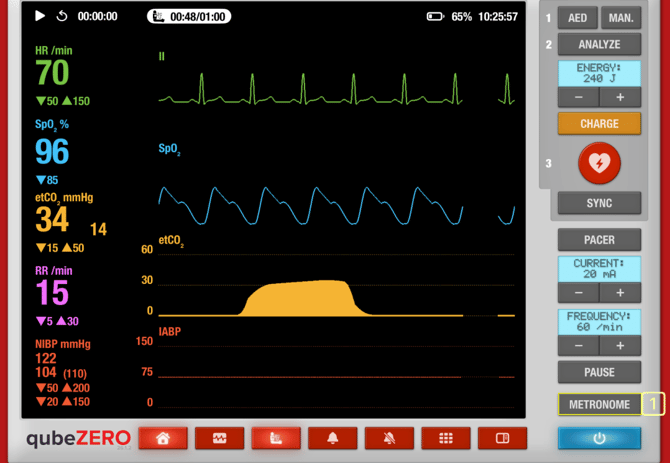
Start the qubeZERO – after launching the app – using the blue "On/Off" button. Tap it once to start. To shut down the system, press and hold the button for three seconds.
Depending on the preset settings, the monitor starts in preclinical or clinical mode.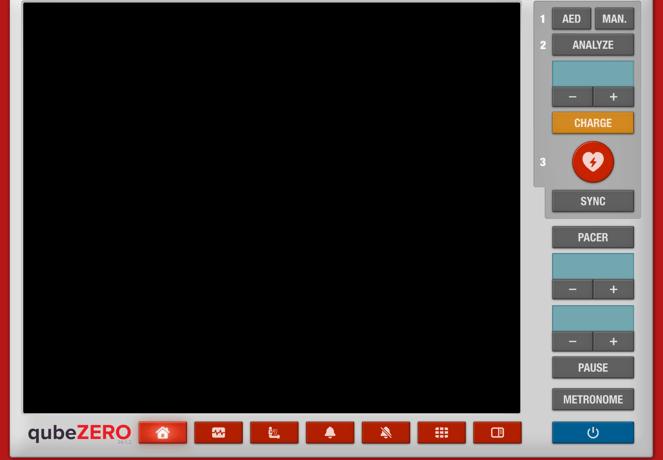
Settings on the qubeZERO
The following options are available in the qubeZERO offered:
- 12-lead ECG recording
- Blood pressure measurement
- Set alarms / Mute alarms
- Change views
- Choice between clinical and preclinical monitor
A. 12-lead ECG
To print the 12-lead ECG, press the corresponding button (1). The controller will display a notification that an ECG has been printed. On the monitor, the Media Center will open, and you can view the ECG.
If you have selected in the app settings that the Media Center should not open automatically when an ECG print job is triggered, swipe from the right side toward the center to open the Media Center manually.
To close it, swipe from the center to the right.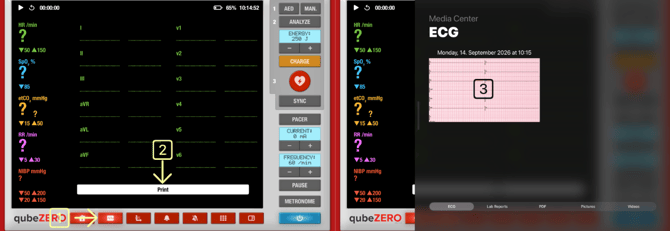
B. Blood pressure measurement
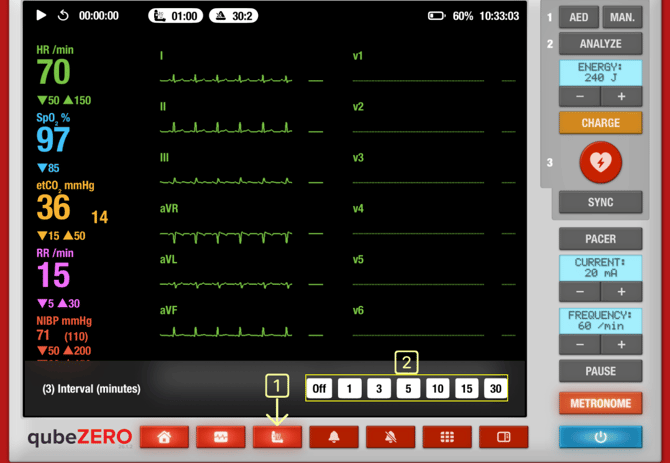
When you press the “Blood Pressure Measurement” button (1), your blood pressure is measured. A dialog box opens at the bottom of the screen, where you can set whether and at what intervals interval measurements should take place (2).
C. Setting alarms / Muting alarms
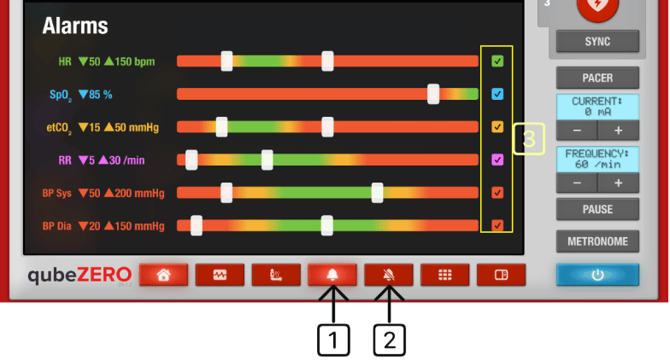
You can access the alarm menu by tapping the “bell” (1). Here, you can toggle the checkbox to turn the alarm on or off (2). Use the sliders to set the alarm limits. To mute the alarms, tap the “crossed-out bell” (3).
D. Change views
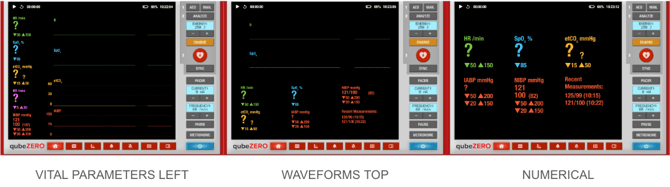
You can switch between three different options by pressing the tile icon.
Switch views.
E. Choice between clinical and preclinical monitor
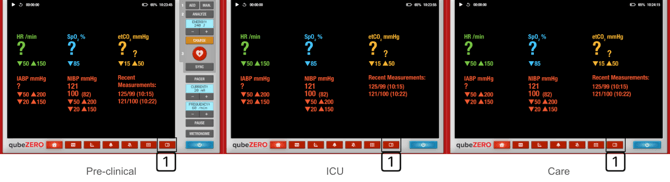
Use the button to the left (1) next to the blue on/off switch to switch between preclinical, intensive care & nursing monitor views.
AED
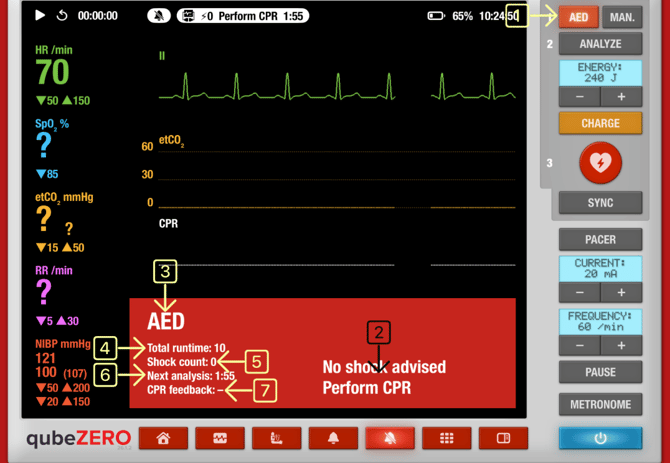
To start the AED, tap the “AED” button (1). Another window with information will open.
1. Activate/deactivate AED
2. AED instructions
3. Modus
4. Total runtime since AED activation
5. Number of shocks administered
6. Next analysis
7. Information on CPR feedback
Manual Mode & SYNC
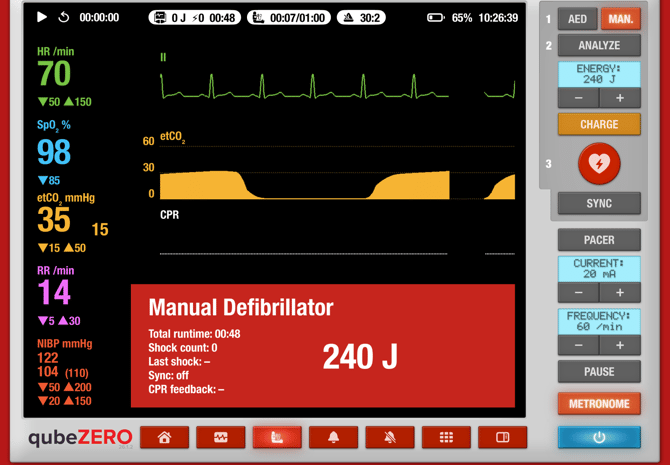
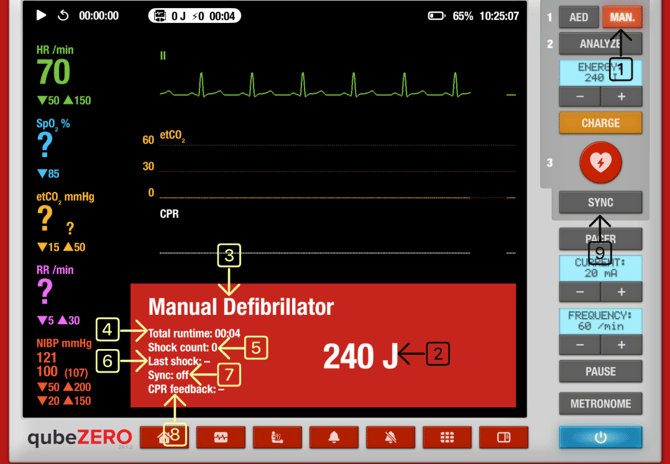
To start manual defibrillation, tap the “MAN” button (1). It will open the window will display further information.
1. Enable/disable manual mode
2. Display of energy for defibrillation in joules
3. Mode Display
4. Total operating time since the manual defibrillator was activated
5. Number of shocks administered
6. Time since the last shock
7. Synchronized defibrillation on/off
8. Information on CPR feedback
9. SYNC function
Pacer / Pacemaker
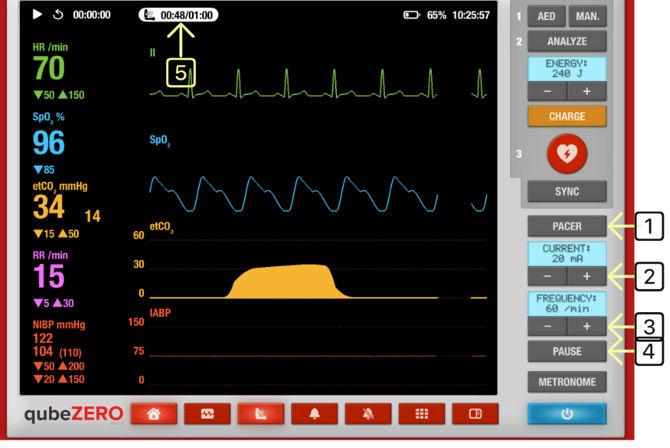
1. Switch pacemaker on/off
2. Adjusting the current intensity via +/-
3. Setting the frequency using +/-
4. Pausing the pacer (frequency is divided by four)
5. Pacer runtime
Metronom
You can use a metronome to help maintain the CPR rate. To activate it, tap the “Metronome” button. You can now select from various modes.
1. 30 / 2 (recommended ratio for adults)
2. 15 / 2 (recommended ratio for children)
3. Continuously
4. OFF
CPR-Feedback
If you are using our CPR feedback device, which is compatible with our system, and have selected the CPR feedback pads as the output, qubeZERO participants will receive feedback on their compression quality in the form of a bar graph for compression depth and text for compression rate.