When using qubeAVgo or qubeAVpro, the qubeSERIES devices (qubeCONTROL, qubeMONITOR, qubeASSESS) must be connected to the qubeAVgo or qubeAVpro network in order to integrate the monitor wirelessly into the qubeAV system. Therefore, in this case, it makes sense to integrate the AmbuManⓇ into the existing network of the qubeAV system.
The AmbuManⓇ can be connected to the existing network via either LAN or Wi-Fi. Both options must be configured in the AmbuManⓇ settings. To do this, you must first connect to the AmbuManⓇ Wi-Fi network. The Wi-Fi network is usually named “AmbuW”.
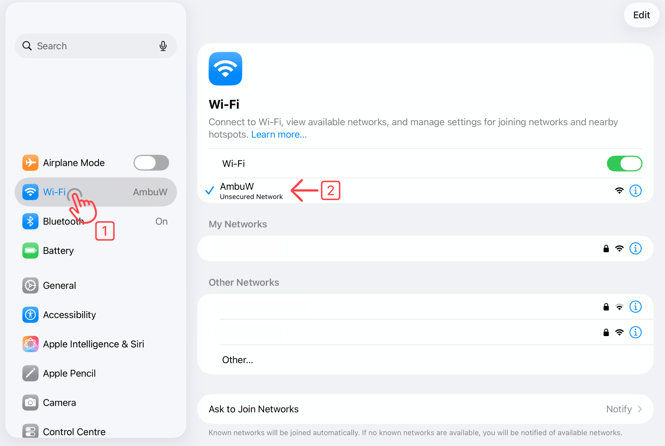
The AmbuManⓇ settings are accessed via a web browser; to do so, enter the AmbuMan’s IP address followed by /config (e.g., 192.168.1.1/config). The required settings vary depending on the desired connection type (Wi-Fi or LAN). If the settings are not configured correctly, a connection to the AmbuMan cannot be established, and the AmbuMan must be reset.
Details on the connection settings can be found in the Ambu Manikin Management Module manual.
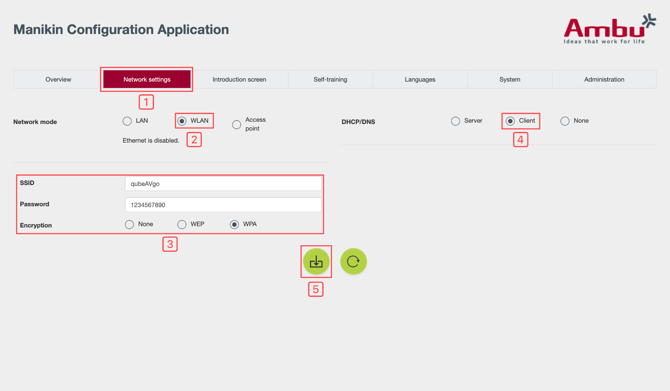
Option 1:Wi-Fi connection:
- Access the network settings on the AmbuMan® settings page.
- Under network mode, select the WLAN option.
- Enter the following Wi-Fi data:
- SSID: Enter the name (SSID) of the Wi-Fi network.
- Password: Enter the Wi-Fi password
- Encryption: Select WPA
- Under DHCP/DNS, select the Client option.
- Click Save to apply the new settings.
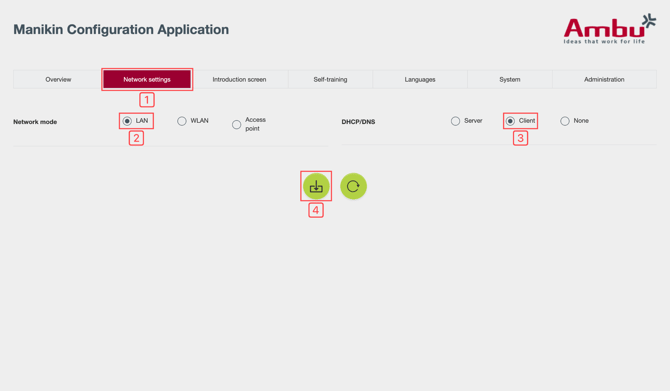
Option 2: LAN connection:
- Access the network settings on the AmbuMan® settings page.
- Select the LAN option under network mode.
- Under DHCP/DNS, select the Client option.
- Click Save to apply the new settings.