Further settings (e.g., units, default values, etc.) can be found in the qubeCLOUD. For this purpose, go to the homepage of the qubeCLOUD > Sim config > Settings. Open it. Then go to the tab “Settings” Switch. The desired app can now be selected on the left. Changes must be made via the button in the bottom right corner “Button” to be saved.
You can do the same with pager texts, lab reports, SOP files, and media. To do this, go to the respective tab and make the desired changes. Here, too, you must save all changes by clicking the “Button” in the lower right corner.
If the settings cannot be opened or edited, the necessary permissions are likely missing. These permissions can be managed by the organization administrator.
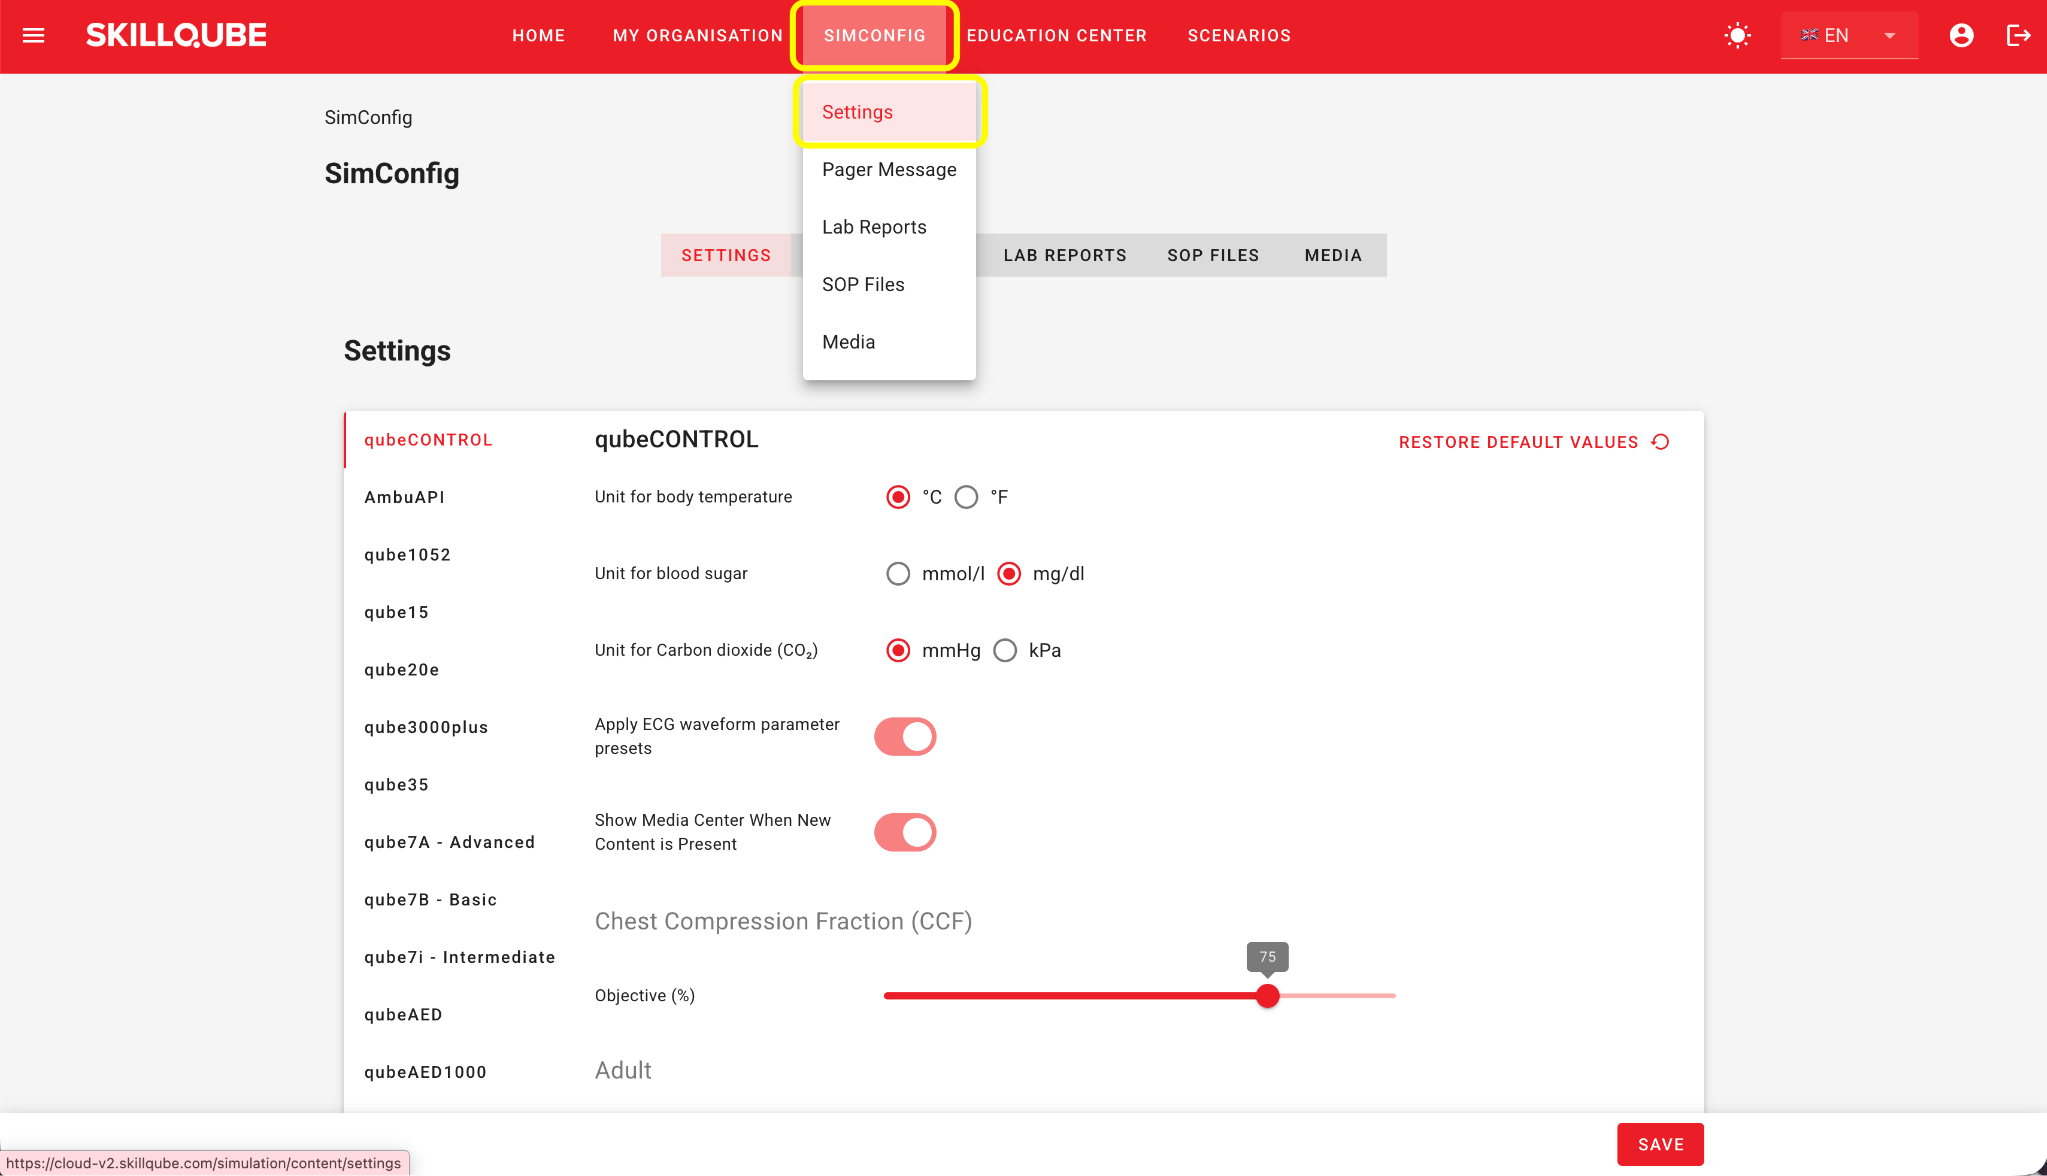
Afterward, qubeCONTROL must be synchronized once to retrieve the updated settings. The available settings can be viewed in the qubeCLOUD.
cloud.skillqube.com/#/simulation/settings
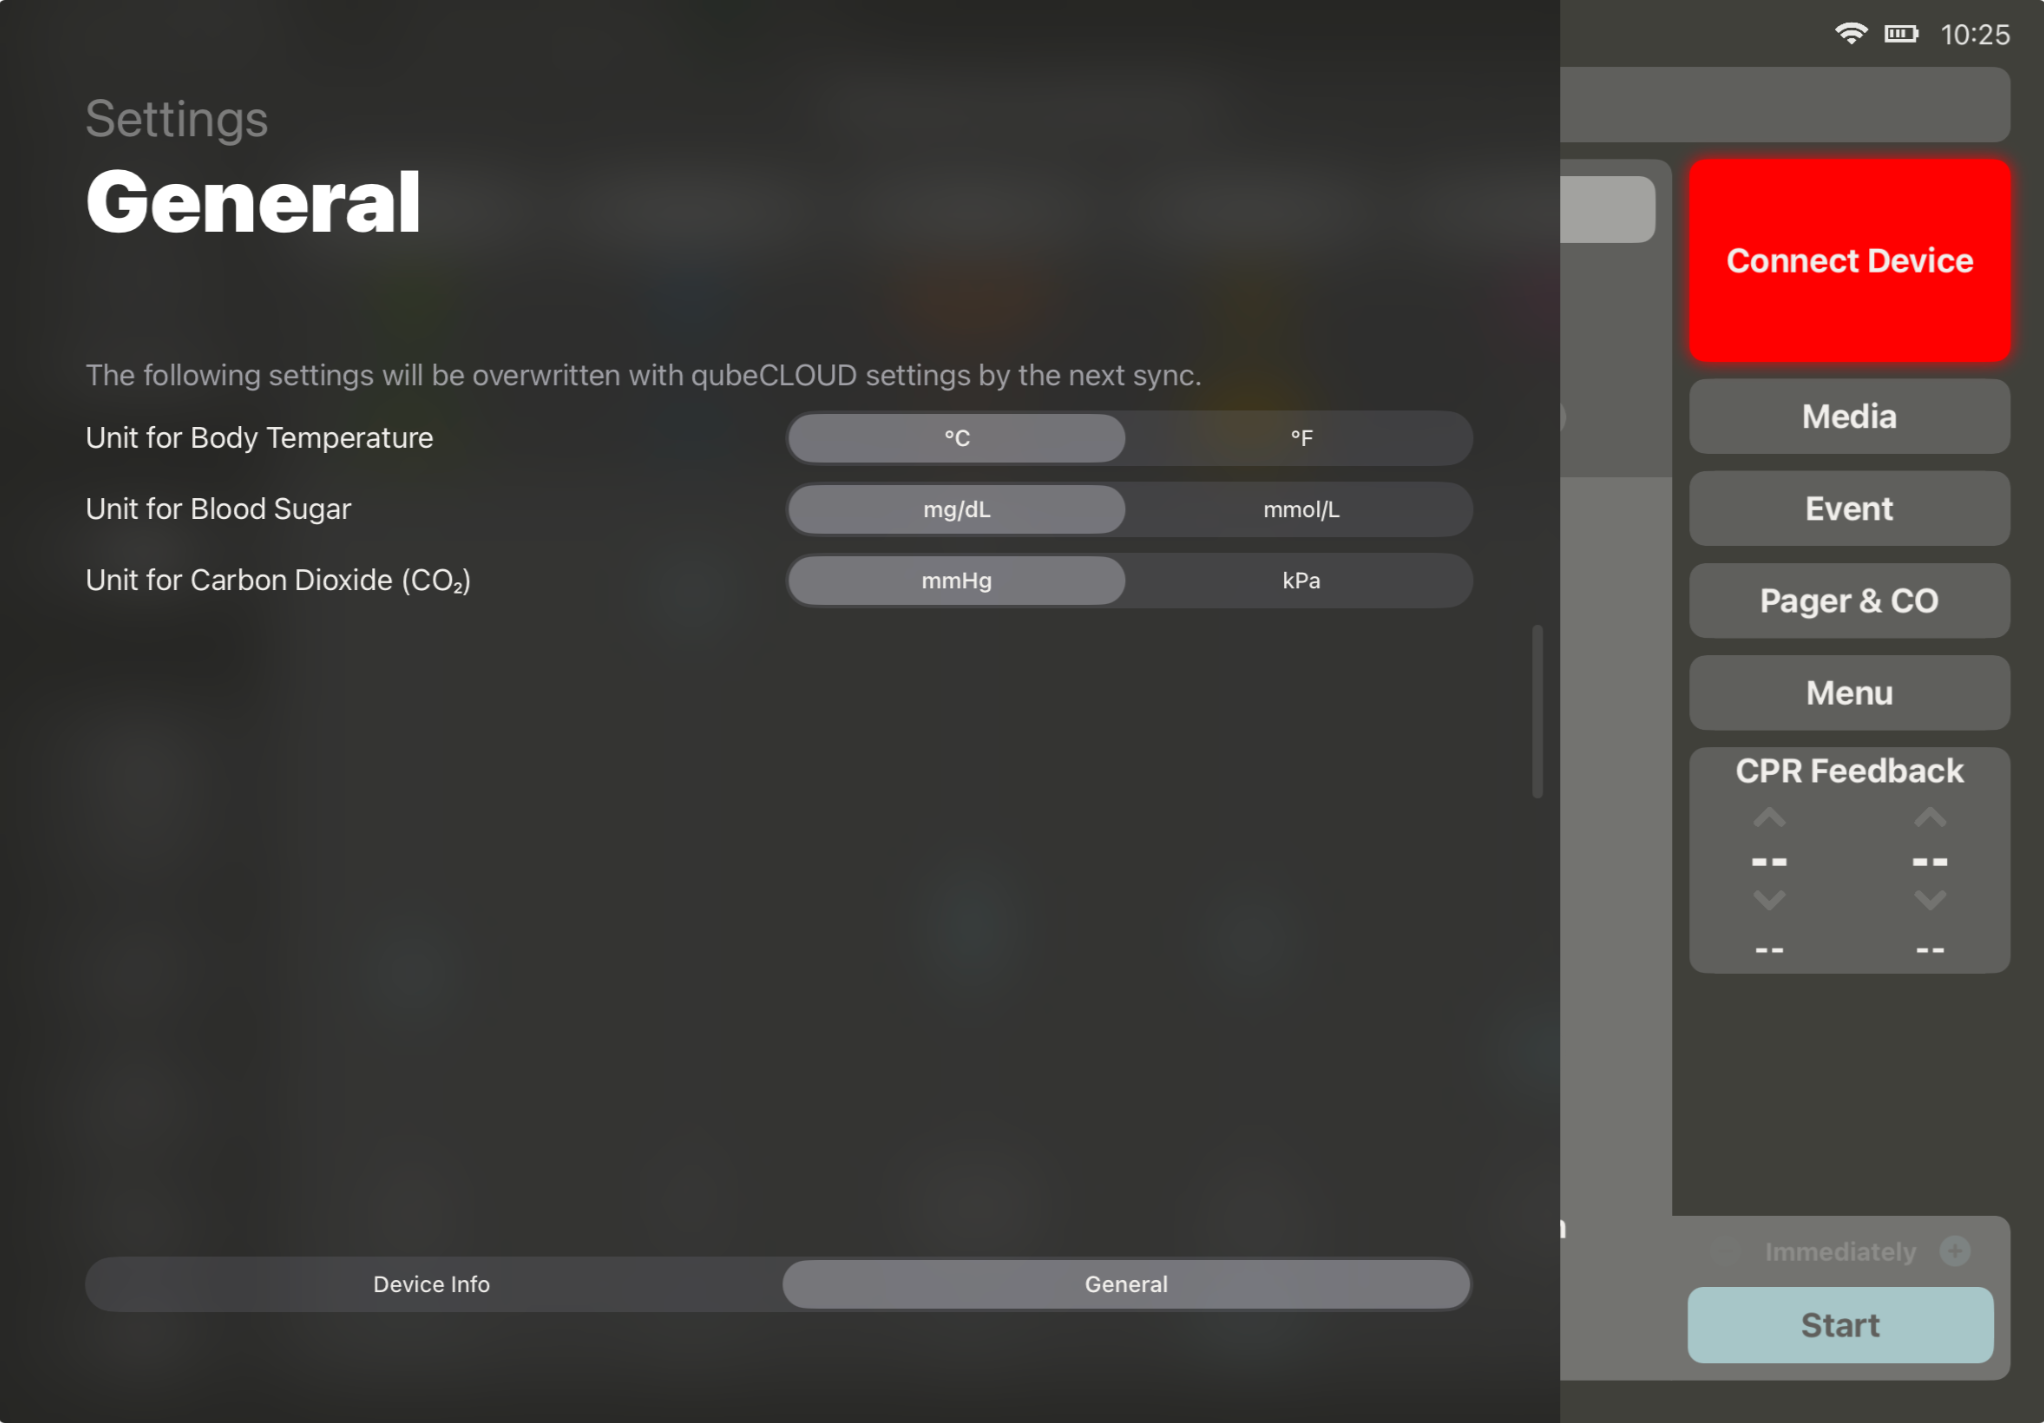
In qubeCONTROL, the units set in the qubeCLOUD can be temporarily overridden. The next time the app syncs, the units from the qubeCLOUD will be restored. Additionally, the patient category (Adult, Child, Infant) can be set via the “Menu” button on the right side of the screen under “CPR Settings.” This is reset to “Adult” when the app is restarted.
To access the settings, you can either tap the app logo (qubeCONTROL) within the app or swipe from the left edge of the screen toward the center to open the device information. Then, select the “General” tab at the bottom, where you can make the desired changes.