
Setup wizard
This wizard will guide you through setting up a new recording. You can skip this step by clicking Cancel.
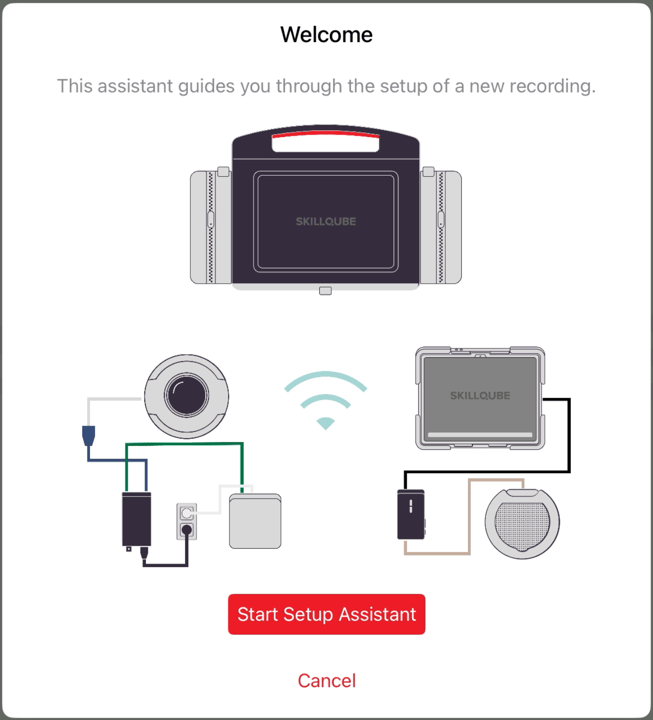
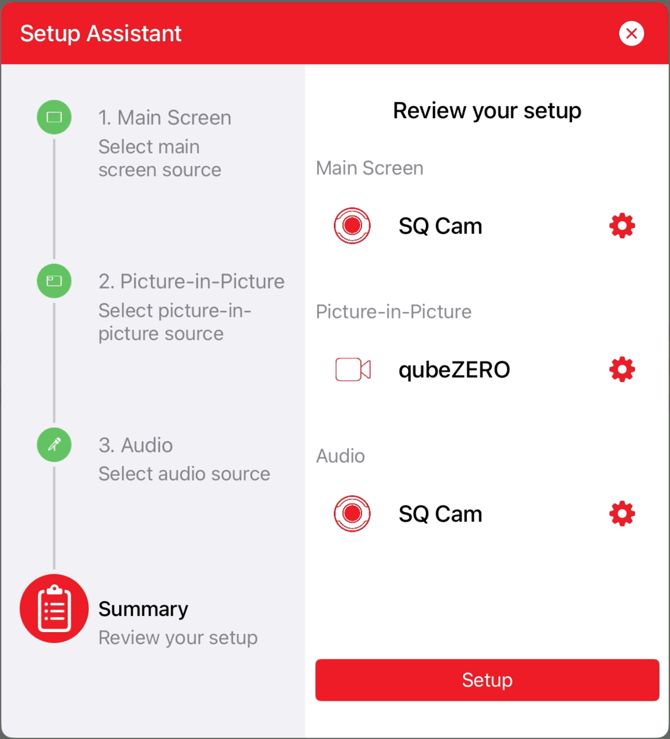
- First, the main image is selected; here you can choose between the iPad camera, other connected cameras, and possibly connected [devices/equipment].qubeMONITOR be elected
- Next, the Picture-in-Picture (PiP) source is selected. The same video sources are available here as for the main image. Alternatively, no Picture-in-Picture source can be selected; in this case, only the main source is recorded.
- Now the audio source is selected; here you can choose between the iPad camera and other connected cameras or microphones.
- Finally, the settings can be checked and, if necessary, adjusted again by clicking on the respective gear icon.
Real-time mode settings
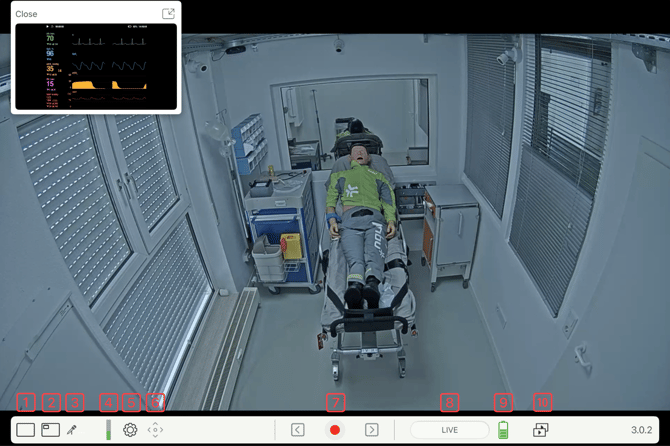
In the bottom bar of the qubeAVgo-software offers various settings and control options.
- Video Setup: It can switch between the iPad camera, other connected cameras, and possibly connected devices.qubeMONITORThe desired view can be selected. Additionally, the view of the included IP camera can be rotated using the upside-down button.
- Auswahl des Picture-in-Picture (PiP) : Optionally, an additional video source can be added. The same video sources are available for selection as for the main image. However, a video source can only be used as the main image or as a picture-in-picture. Using two sources at once is not possible.
- Audio Setup: You can select between the iPad camera and other connected cameras or microphones by tapping.
- Audiopegel: The audio level indicates the level of the transmitted audio signal.
- Settings:
Account: A single click on "Account" allows you to log out of or log in to an account.
Pre-roll: Here you set how many seconds the marker should be reset.
Storage location: Here you can change the storage location of your recordings.
Streaming Protocol: Here you can change the streaming protocol for received streams.
Support: Click the support button for help. An internet connection is required.
Above: The app version number is displayed here, among other things.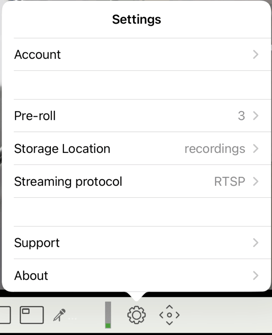
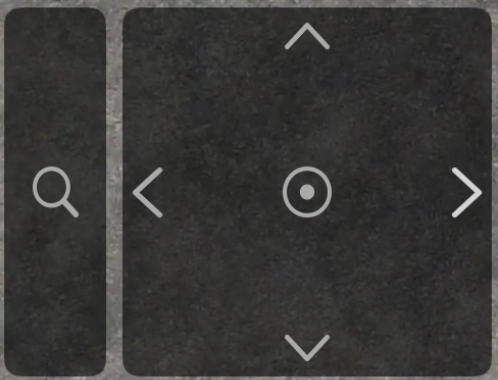
- The camera controls allow you to adjust the image from the included external camera (viewing direction and angle). To do this, drag the digital joystick from the center to the left, right, up, or down. The magnifying glass icon allows you to adjust the zoom. To zoom, drag the slider from the center up (to enlarge) or down (to reduce).
- Pressing the record button starts a new recording.
- The status indicator shows which mode the qubeAVgo is in.
LIVE:Real-time view
REC:Recording mode
REPLAY:Playback mode - Battery status indicator. The status indicator turns red when the battery level reaches 20%.
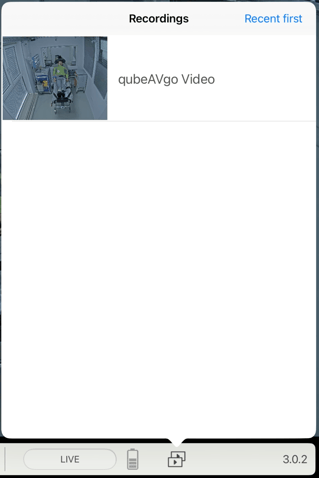
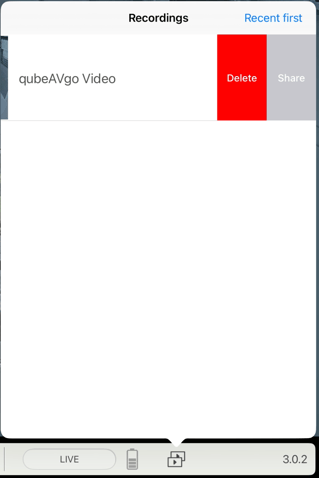
- Recordings are saved under Recordings. Tapping opens an existing recording. Swiping left deletes the recording or exports it as an MP4 file (Share). Exporting may take a few minutes.
 .
. 
- Additionally, the app version number is displayed in the bottom right corner.
Settings in recording mode
Once video and audio sources have been selected, recording can be started using the record button. The settings and control options change when a recording starts.
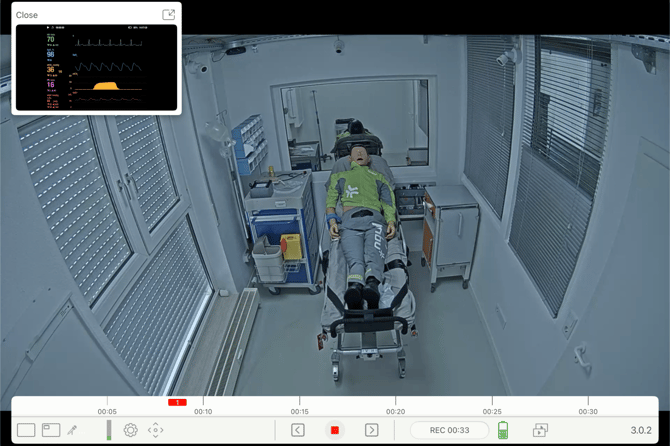
- To set markers, you write or draw on the moving image. When you set a marker, the settings open automatically. The saved markers are labeled numerically and with a color and appear in the timeline of the recording mode. When setting a marker, various settings are available for the marker.
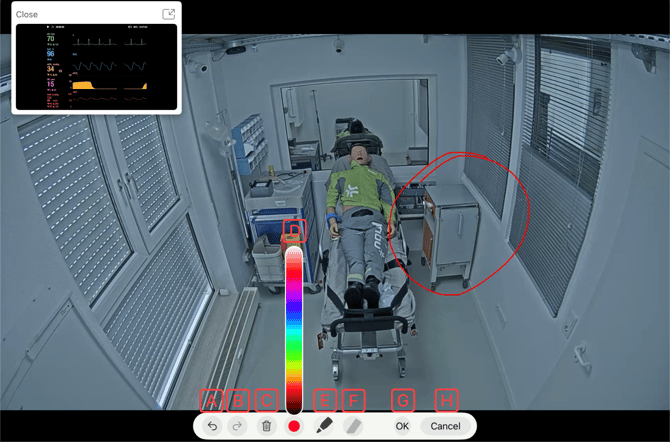
Remove markings step by step
Undo removal
Delete selection and start again
Pen color selection
Select pen
Select eraser
Save marker
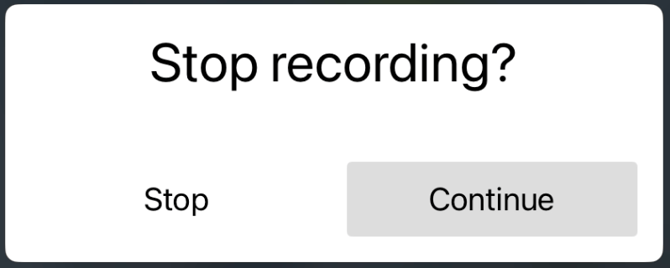
Cancel selection - Pressing the stop button will end the recording. You must confirm that you want to stop recording to prevent accidental termination. After recording has ended, the app will automatically switch to playback mode.
Settings in playback mode
The settings and control options change in playback mode.
When using the boundary microphone, the USB-C cable must be unplugged after recording in order to play the audio on the iPad.
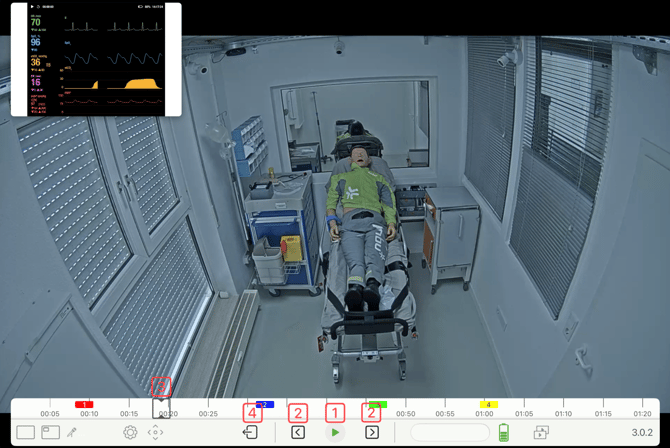
- Pressing the start button begins playback of the recording.
- Use the arrows to switch between the markers.
- Move the timeline marker to jump to any point in the playback.
- Tapping the exit button ends playback mode and returns you to the real-time view. You will then be asked if you want to save the recording.