Settings in qubeCLOUD:
- First, you need to log in to qubeCLOUD.
https://cloud-v2.skillqube.com/login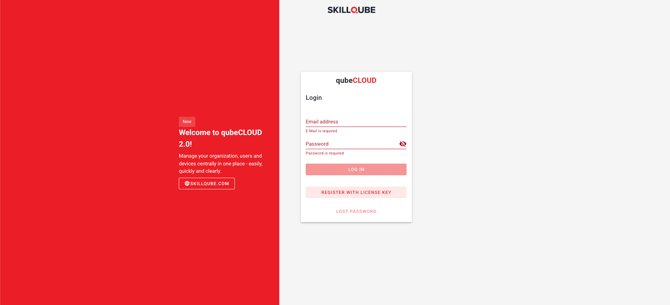
- In the top menu, select the “Simkonfig” tab > “Settings”

- The licensed devices are listed in the left-hand menu bar; in this case, select either the qubeC3 or qubeC3T.
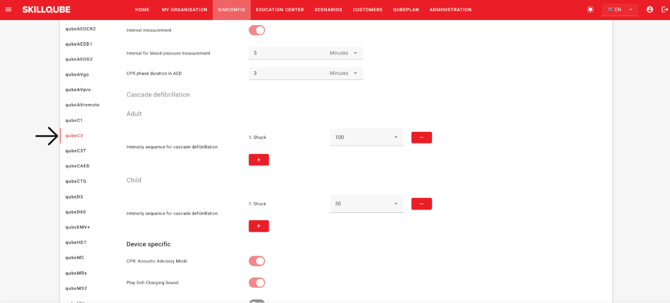
- Scroll down until you see the “Views” section. This section represents the layout editor for qubeC3 / qubeC3T.
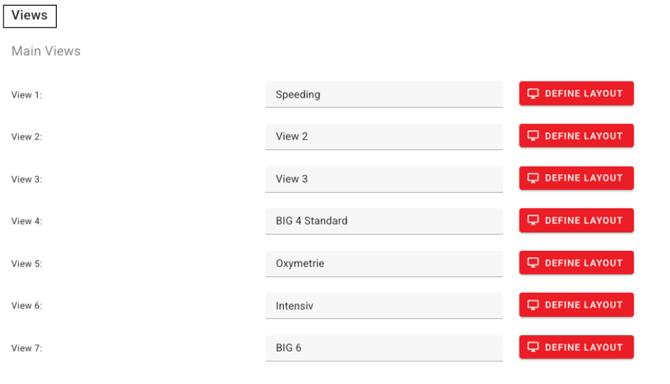
View qubeMONITOR:
- There are seven main views available for each device, which can be defined.
- To define a main view, you must click the “Define Layout” button shown in red.
- Select the desired view.
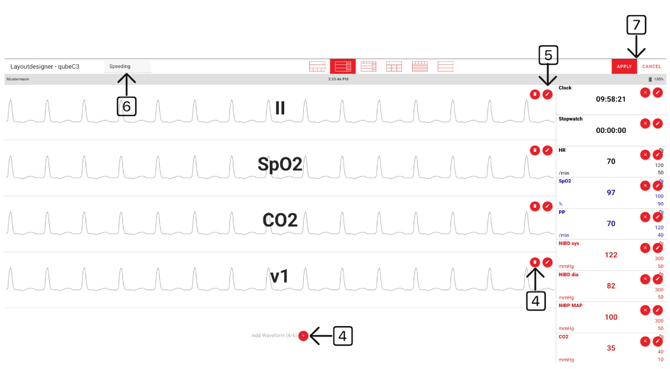
- In the Layout Designer, you can click the “+” icon in empty spaces to add new elements, or edit existing elements using the pencil icon.
- If you want to remove certain elements, you can delete them using the “Recycle Bin” icon.
- Next to the text “Layout Designer – qubeC3 / qubeC3T you can rename the view.
- Finally, you can save the changes you’ve made by clicking “Apply” or discard them by clicking “Cancel.”
View Defi/ AED/ Pacer:
- Unlike the main view, you cannot assign custom names to subviews. Instead, you can only define layouts for DEFI, AED, and Pacer here.
- To configure a subview, click the “Define Layout” button shown in red. This will take you to the layout designer.
- First, select the desired view from the top bar.
- After making your selection, you can click the “+” icon in empty spaces to add new elements, or edit existing elements using the pencil icon.
- If you want to remove certain elements, you can delete them using the “Recycle Bin” icon.
- Finally, you can save or discard the changes you’ve made using the corresponding button.
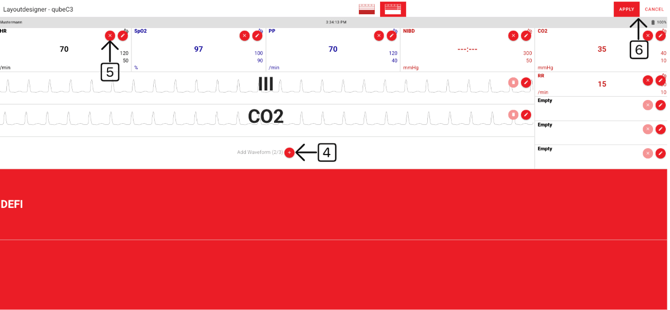
Note: The fields highlighted in color are predefined and cannot be edited.
Saving the Changed Settings
- To save the changes you've made, you must first check to make sure that all fields have a name.
Note: If a name is omitted, the save cannot be processed.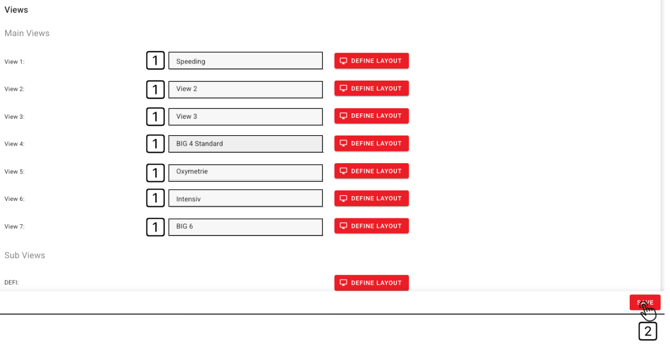
- Finally, you need to click the “Save” button once.
Apply changes to qubeMONITOR:
- First, you need to check whether your iPad is connected to a Wi-Fi network with internet access. Once you have established an internet connection via a Wi-Fi network, please open qubeCONTROL.
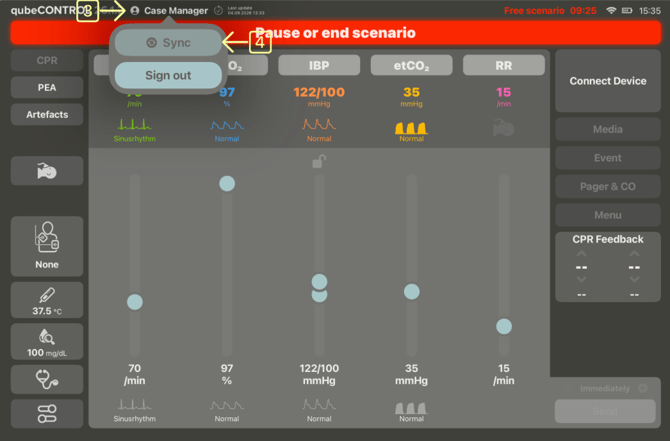
- In the upper-left corner, you should see “qubeCONTROL” and the logged-in user’s name. Please tap the logged-in user’s name once.
- The option to sign out and sync should now appear. Please press the “SYNC” button once.